When you're churning out large amounts of content — whether you're on your own, or outsourcing some or all of your content creation — things get kind of cluttered and disorganized pretty fast.
Writing true “10x content” takes time, and it has quite a few steps that lead to something that's fit for publication.
Many writers create a relatively detailed outline first, for example, to put a blog post's “skeleton” in place before writing.
You may need to create custom graphics, take screenshots, or find stock images, too.
Take it from a professional writer: you need some kind of system to organize your workflow.
One of the best tools for this is called Trello.
It's been around since 2011, and it's based on a project management paradigm called “kanban.”
Kanban was originally invented in Japan in the 1980s, for supply chain management.
Surprisingly, this system works well for producing intangible goods, too.
Think of each blog post as a widget moving down an assembly line.
First it's in a “planning” phase, then outlining, then research and draft creation. Not to mention editing and revising the piece before it's published.
Trello's kanban-based system uses a card for each project or task. You move this card into a new column when it's moved to a new step in the process.
Here's how to create and use Trello boards for your content writing workflows.
Create a Trello Board for Your Blog Workflow
Trello is your one-stop solution for organizing your blog content from ideation through publishing. What makes Trello ideal for this workflow is that you can sort your lists chronologically across your board to support blog content creation.
Start by signing up for a free Trello account.
While paid plans are available, a free plan is more than sufficient for producing content for your blog. If you’re new to Trello, it’s a good idea to first read this article on getting started with Trello.
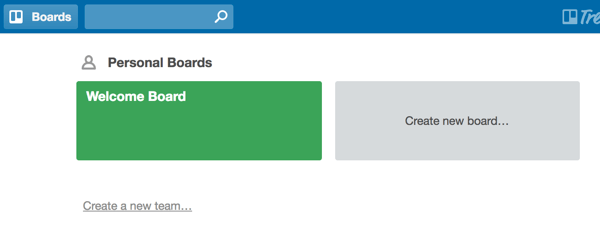
Once you’ve signed up, you’ll have access to the main board and teams page, which is the hub for all of the boards and teams of which you’re a member.
Boards are the main interfaces of Trello; you’ll be spending the majority of your time here. If you have a blogging team, you’ll control blog content creation from your board.
Trello defines a “team” as a collection of boards and people that you can use to organize your blog and other aspects of your business.
For instance, your marketing team may have just one board, but it’s part of a series of boards that correspond to divisions in your company (like Legal, Human Resources, etc.).
Creating a board for your blog content is easy.
Simply click on the Create New Board card.
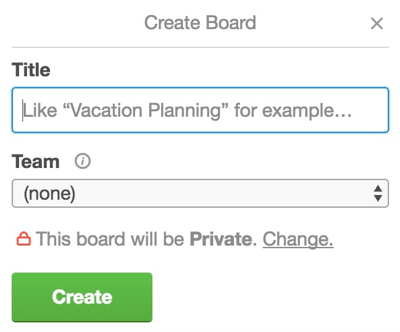
Name your board something straightforward, like My Company’s Blog.
[image source: Social Media Examiner]
Enter a name for your Trello board and create a team if applicable.
Once you’ve created your board, you can start adding lists to populate the board. Lists are vertical columns that act as their own categories for various topics and tasks.
To support ideation-to-publication workflows, click Add a List… and name your first list Blog Ideas, or something similar. This is where all of your blog post suggestions will go.
Subsequent lists on your board should reflect the content creation workflow in a logical fashion. For example, name the next list Articles Being Written (for content in progress).
Move Cards Into New Lists to Reflect Content Progress
As content progresses through your workflow, drag and drop cards from left to right on your board. For example, if a card represents content that’s been completed, drag it from the Articles Being Written list to the Sent for Approval list.
When a card is moved to the Sent for Approval list, editors and writers can seamlessly communicate within the card itself. They can notify one another to request changes or updates to the blog post.
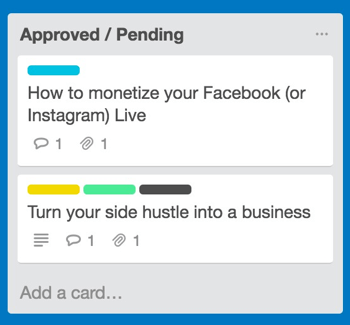
When the editor approves the article, move the card to the Approved/Pending list, where it’s just one stop away from being published.
[image source: Social Media Examiner]
When articles are approved, move their cards to the Approved/Pending list.
Finally, when the article goes live on your blog, pat yourself on the back and move the card to Published, its final stop on the board!
Archive Published Content Cards Regularly
Depending on how aggressively you publish content on your blog (larger blogs publish several times a week, while smaller ones tend to publish once a week or less frequently), your Published list will eventually have a lot of cards taking up room vertically on the screen.
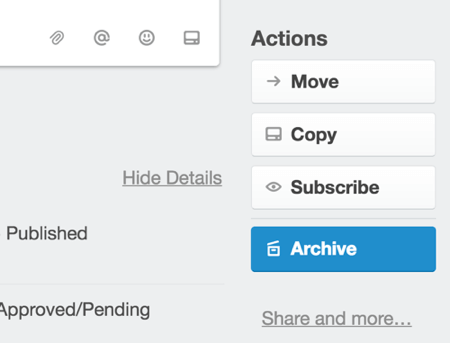
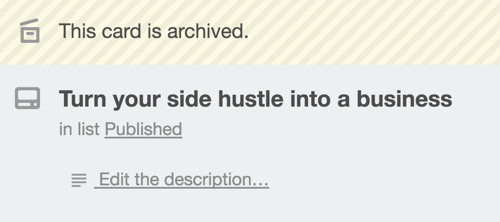
To clean up your board and make it clear what content is still being developed and what’s already live, archive the cards of blog posts that have already been published. To do this, open the card of the published post and click Archive in the Actions section.
You’ll then see “This Card Is Archived” at the top-left corner of the card.
[image source: Social Media Examiner]
After you click Archive on a Trello card, you’ll see a message at the top of the screen confirming your action.
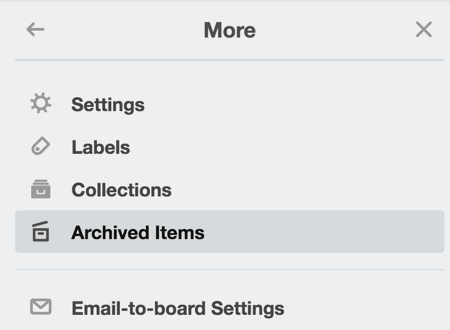
To access archived content, open the menu on the right, select More, and then select Archived Items.
[image source: Social Media Examiner]
You can find more information about how to use Trello to its full potential over at Social Media Examiner.
CHALLENGE Yourself to Profit!
Free Download: Build Your Profit-Generating Online Business With This Free Blueprint
Sign Up, follow the easy steps and You'll get the tactics, strategies & techniques needed to create your online profit stream. It's free!

